Using Azure AD with React and .NET Core
In this tutorial, we’ll walk through using Azure Active Directory (AD) to secure a React application with a .NET Core backend.
Prerequisites
- An Azure account with permissions to create an Azure AD tenant and register an application
- .NET Core SDK installed
- Node.js and npm installed
- React app created with
create-react-app
Part 1: Azure AD setup
- Log into the Azure portal and create a new Azure AD tenant.
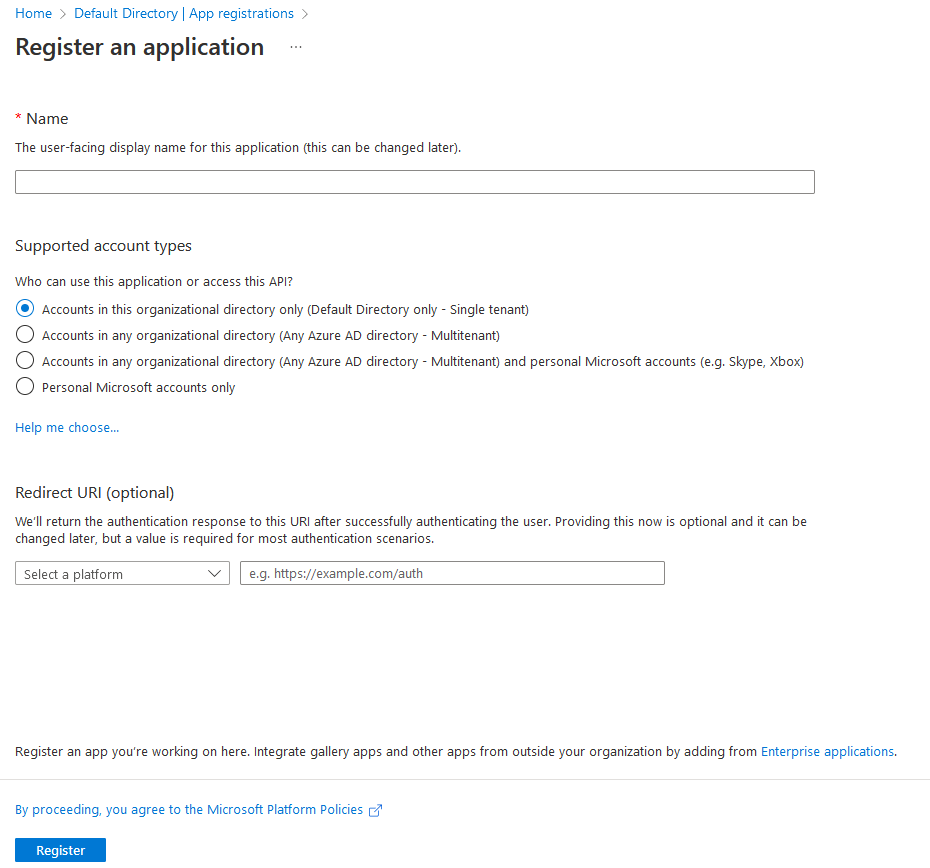
- Register a new application in the Azure AD tenant.

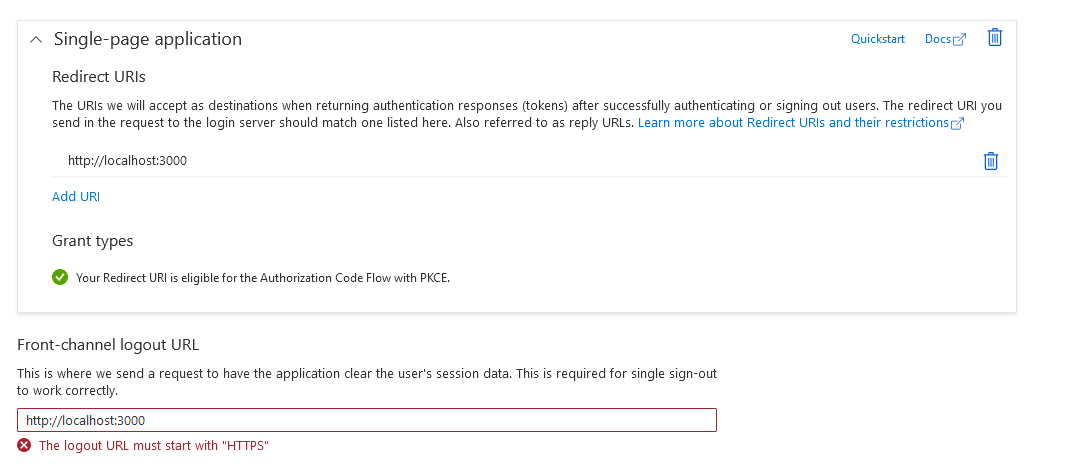
- Configure the application’s redirect URI to match the URI of your React application (e.g.
http://localhost:3000). For redirecting logout to work without HTTPS, modify the Front-Channel Logout in the manifest.

- Grant the application permissions to access the API(s) that the .NET Core backend will expose.

Part 2: .NET Core backend setup
- Create a new .NET Core Web API project.
- Install the
Microsoft.AspNetCore.Authentication.JwtBearerNuGet package. - Configure the authentication middleware to use Azure AD as the authentication provider.
- Add an authorization policy to require authenticated users for protected endpoints.
In the appsettings.json
{
  "Logging": {
    "LogLevel": {
      "Default": "Information",
      "Microsoft.AspNetCore": "Warning"
    }
  },
  "AllowedHosts": "*",
  "AzureAd": {
    "Instance": "https://login.microsoftonline.com/",
    "Domain": "",
    "TenantId": "",
    "ClientId": ""
  }
}
In program config
builder.Services.AddAuthentication(JwtBearerDefaults.AuthenticationScheme)
    .AddMicrosoftIdentityWebApi(builder.Configuration.GetSection("AzureAd"));
Part 3: React app setup
- Install the
react-aad-msalnpm package to handle authentication with Azure AD. - Configure the
react-aad-msalprovider component to use your Azure AD application’s client ID and redirect URI. - Wrap the React app with the
react-aad-msalprovider component. - Use the
AuthenticationContextobject provided byreact-aad-msalto authenticate the user and acquire and access token. - Send the access token as a bearer token in requests to the .NET Core backend.
Sign in
export const SignInButton = () => {
  const { instance } = useMsal();

  const handleLogin = () => {
    instance.loginRedirect(loginRequest).catch((e) => {
        console.log(e);
      });
  };
  return (
    <button
      onClick={handleLogin}
      className="group relative flex w-full justify-center rounded-md border border-transparent
      bg-indigo-600 py-2 px-4 text-sm font-medium text-white hover:bg-indigo-700
      focus:outline-none focus:ring-2 focus:ring-indigo-500 focus:ring-offset-2"
    >
      Sign in
    </button>
  );
};
Sign out
export const SignOutButton = () => {
  const { instance } = useMsal();

  const handleLogout = () => {
    instance.logoutRedirect({
        postLogoutRedirectUri: "http://localhost:3000",
      });
  };
  return (
    <button
      onClick={handleLogout}
      className="text-gray-300 hover:bg-gray-700 hover:text-white px-3 py-2 rounded-md text-sm font-medium">
      Sign Out
    </button>
  );
};
The acquireTokenSilent will handle the token refresh
  const getWeatherForecast = () => {
    instance
      .acquireTokenSilent({
        ...loginRequest,
        account: accounts[0],
      })
      .then((response) => {
        const headers = new Headers();
        const bearer = `Bearer ${response.accessToken}`;

        headers.append("Authorization", bearer);

        const options = {
          method: "GET",
          headers: headers,
        };

        fetch(process.env.REACT_APP_API_PATH + "/WeatherForecast", options).then(
          (response) => {
            if (response.ok) {
              response.json().then((value) => setData(value));
            }
          }
        );
      });
  };
Conclusion
By following this tutorial, you should now have a React application secured with Azure AD authentication and a .NET Core backend that validates access tokens. With this setup, you can build secure, authenticated applications that utilize Azure AD for identity management.